3d WebGL Browser Game #4: Continuous Delivery
One of the many advantages of building for the web is the ease of deployment and distribution. A user just needs a hyperlink and, caching aside, they’ll always get the most up to date version of your software whenever they use it. You don’t have to worry about users turning off updates or waiting for a review process. As soon as you have new code, you can get it out to your users with relative ease.
Continuous delivery is the practice of automatically pushing out new updates to your users, as soon as they exist. This usually looks like pushing code to origin/master and having a process automatically run once your new code lands.
With a manual deploy process you’re bound to occasionally forget one of your steps and then have to deal with the headache and/or context switch of doubling back to release your code. You’ll also sometimes hesitate to deploy small commits, opting to just wait until you’ve made a few more commits.
Fully automated delivery, on the other hand, begets rapid iteration.
Last week we implemented continuous delivery for the client and a server repositories.
Client Deploy Process
Our production client is a simple HTML file that points to our JavaScript game application.
<!-- index.html -->
<!DOCTYPE html>
<html lang="en">
  <head>
    <title>3d WebGL Browser Game</title>
    <meta charset="utf-8">
  </head>
  <body>
    <script type="text/javascript">
      // We load our segment.io analytics.js here
    </script>
    <script src="bundle.js"></script>
  </body>
</html>
Our index.html and bundle.js files live on Amazon S3 and are served via our Amazon Cloudfront global CDN.
In order to deliver the latest code to users we need to upload new builds to S3 and make sure that they circumvent our CDN’s cache. We use EagerIO/Stout to handle all of this and it has worked marvelously so far.
Now we just run Stout whenever we push new code to master branch, so long as our tests pass. For this we use circleci.
Here’s our circle.yml that handles this:
machine:
  node:
    version: 5.6.0
  post:
    - npm install -g npm@3.x.x

dependencies:
  post:
    - git clone git@github.com:EagerIO/Stout.git
    - cd Stout; go build -o ../stout src/*.go

deployment:
  production:
    branch: master
    commands:
      - npm install
      - npm run dist:prod
      - ./stout deploy --env production --bucket my-production-bucket --key $AMAZON_KEY_PRODUCTION --secret $AMAZON_SECRET_PRODUCTION --root ./dist

  staging:
    branch: staging
    commands:
      - npm install
      - npm run dist:stag
      - ./stout deploy --env staging --bucket my-staging-bucket --key $AMAZON_KEY_STAGING --secret $AMAZON_SECRET_STAGING --root ./dist
Server Deploy Process
Our production server is a single Node.js application (no micro-services necessary yet!). Similar to our client deploy process, we want to spin up a new server whenever code lands in our server’s origin/master branch.
After I bit of googling I found a few tutorials on setting up continuous delivery to a Kubernetes cluster. I’ve been meaning to try out Google Cloud for the first time so this was a perfect opportunity.
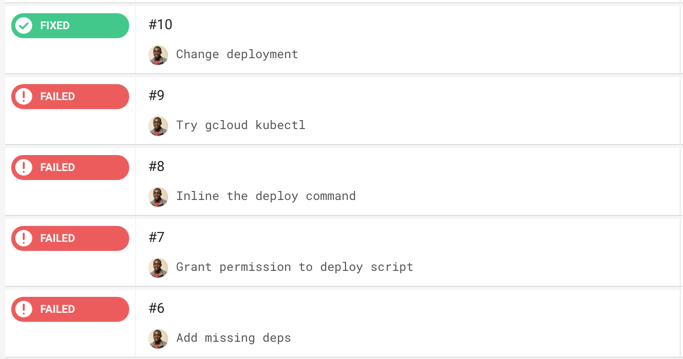
After a few failed attempts things finally came together
Here’s our circle.yml that builds and pushes a new docker image and then points our Kubernetes cluster to the new image whenever we deploy to origin/master in the server repo.
machine:
  environment:
    PROJECT_NAME: my-game-project
    CLUSTER_NAME: my-game-project-server-1
    CLOUDSDK_COMPUTE_ZONE: us-east1-d
  services:
    - docker

dependencies:
  pre:
    - sudo /opt/google-cloud-sdk/bin/gcloud --quiet components update
    - sudo /opt/google-cloud-sdk/bin/gcloud --quiet components update kubectl
    - echo $GCLOUD_SERVICE_KEY | base64 --decode -i > ${HOME}/gcloud-service-key.json
    - sudo /opt/google-cloud-sdk/bin/gcloud auth activate-service-account --key-file ${HOME}/gcloud-service-key.json
    - sudo /opt/google-cloud-sdk/bin/gcloud config set project $PROJECT_NAME
    - sudo /opt/google-cloud-sdk/bin/gcloud --quiet config set container/cluster $CLUSTER_NAME
    - sudo /opt/google-cloud-sdk/bin/gcloud config set compute/zone ${CLOUDSDK_COMPUTE_ZONE}
    - sudo /opt/google-cloud-sdk/bin/gcloud --quiet container clusters get-credentials $CLUSTER_NAME
    - docker build -t gcr.io/${PROJECT_NAME}/lighthouse-server:$CIRCLE_SHA1 .
    - docker tag gcr.io/${PROJECT_NAME}/lighthouse-server:$CIRCLE_SHA1 gcr.io/${PROJECT_NAME}/lighthouse-server:latest

deployment:
  production:
    branch: master
    commands:
      - sudo /opt/google-cloud-sdk/bin/gcloud docker push gcr.io/${PROJECT_NAME}/my-game-project
      - sudo chown -R ubuntu:ubuntu /home/ubuntu/.kube
      - kubectl patch deployment my-game-project-server-1 -p '{"spec":{"template":{"spec":{"containers":[{"name":"my-game-project-server-1","image":"gcr.io/my-game-project/my-game-project:'"$CIRCLE_SHA1"'"}]}}}}'
Our production game server is a single Kubernetes cluster with a single internal node.
Potential Future Issues
Right now the client and server repos are separate, so if I ever forgot to push both up to their respective origin/master branches we might have incompatible versions running in production. There are certainly ways around this that I can deal with later.
We also have no way for clients to re-connect after the new game server is deployed. It’s unlikely that this will be a priority anytime soon.
I don’t think that our delivery system will look the same down the line, but hopefully it will hold up pre-alpha code releases. We’ll improve things as we run into new delivery challenges!
What’s Next?
I’ll like to maintain a steady pipeline of people trying out the game and giving feedback and criticism from here on out. I’ll start off with some friends and try to branch out from there.
Speaking of which, you’ll be able to access the game at game.chinedufn.com all throughout development, so I’d love for you to poke around and shoot me an email or tweet with your feedback!
Much appreciated!
- CFN